To Jeep, is to customize, create and share… Wow, I never knew I had such poetry in me.
I have been the beneficiary of lots of mechanical advise on my TJ over the past few years. When I start a project I generally hit the Forums, YouTube or Google before I start a project. As we all know, some of the help you get online can be great or completely sketchy depending on who you turn to. I have to admit I do love to watch the videos where the person posting just goes for it regardless of whether they know what there doing or not…
Im pretty fortunate to have a group of local friends who are very mechanical and creative. If I get into a serious bind I can always fall back on one of them for a mechanical pull out. Today I will be posting an article by one of my buddies. He had the problem of oversized tires tossing road gunk up onto the sides of his JK. The easy solution is mounting a set of mud flaps on, but then you are stuck with mud flaps on your rig… My bias here is that I don’t really like mud flaps, but I do recognize their utilitarian function.
My buddy EP JK came up with a pretty good fix to the problem. Take a look and see what you think.
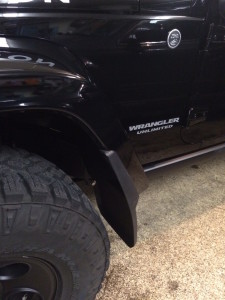
Problem: With a lifted JK and oversized tires, 35″ GY DT, slush and salt kick up onto door hinges and rear fenders during winter months. I want to protect the body from kick-up off the front tires but don’t want permanent mud flaps added. The flaps need to be long enough to mitigate kick up with the lift and oversized tire combination and need to be removable for summer and wheeling trips. Oh, and I don’t want to break the bank for the solution.
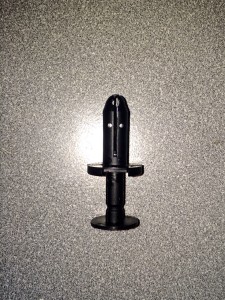
The fix: A friend of mine gave me a set of lightly used OEM style Jeep front mud flaps. There was no hardware included and my friend informed me that self tapping screws and J-Clips were used for install. I don’t have a problem with J-Clips, but using self tapping screws for a few seasons poses the potential problem of wallowed out screw holes in the plastic fenders. Furthermore, there is nothing quick about either of these fasteners. I decided to try using OEM 105E1 Push Pins (part# 6504521 at my local Jeep dealer) to fasten the flaps to the front fenders. These little guys are about $3.75 each but could probably be purchased at Fastenall or Grainger for less. The idea is that the pins can be pulled and the mud flaps taken off quickly on the trail with a knife or screw driver.
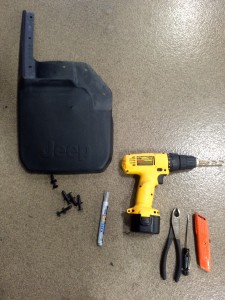
Install (about 35 minutes): I used the following tools: cordless drill, 5/16″ drill bit, utility knife, wire snips, paint marking pen, mud flaps and 6 push pins per mud flap (yes, I wore safety glasses). Prior to beginning install, I pre drilled each hole in the mud flap with the 5/16″ bit and checked for snug (not tight) fit with the push pins. If these were new OEM mud flaps, I’m not sure that the mud flap lower fender liner holes would have been pre drilled. Hint: You may have to turn your tires to full lock right or left during the install to access the fender or fender liner.
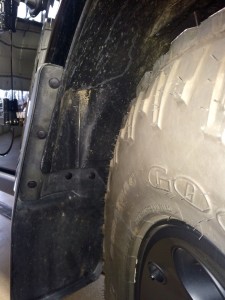
Next, I used a wire snips to clip the backs off the fasteners that hold the outside edge of the fender and fender liner together. These two fasteners can be accessed at the bottom of the rear of the fender. If you don’t want to get dirty, the utility knife can carefully be used to cut the head off the two fasteners. The fastener stem can then be pushed out of the hole with a small screw driver or similar tool.image4.JPG
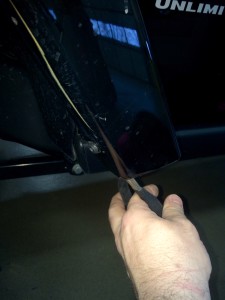
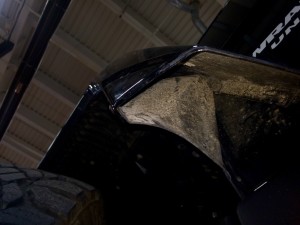
(The second photo is of the underside of the fender/ fender liner to show access space to cut fasteners)
I then used the mud flap held up to the fender as a guide to mark where the push pin holes would be drilled.
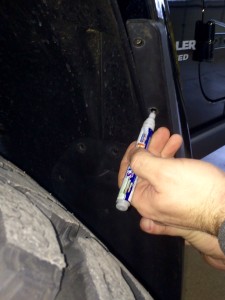
Using the 5/16″ drill bit, I drilled the two previous fastener holes on the fender to size, making sure to line up the fender liner holes as I drilled.
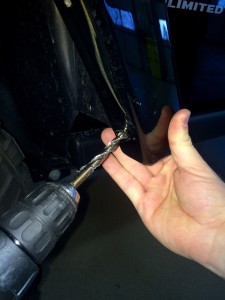
Push pins were then inserted into the two holes in the fender and fender liner to bring the two together.
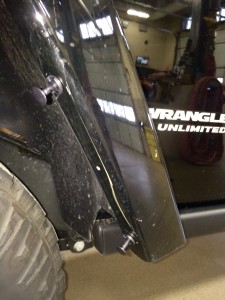
With the fender and liner held together with the push pins, the 5/16″ drill bit was used to drill the 3rd hole on the fender. This hole is midway between the two pushpins. There is enough room to access the back of the fender from the underside rear and apply back pressure with your hand while drilling the hole. Hint: Don’t drill your hand.
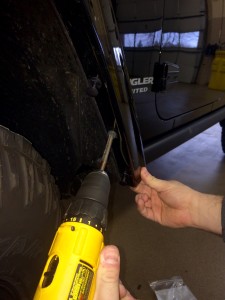
Next, the holes in lower portion of the fender liner need to be drilled with the 5/16″ drill bit. This is pretty straight forward. Be careful not to drill too deep and nick up any equipment behind the fender liner.
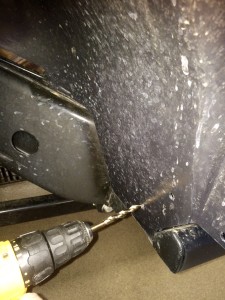
Once all of the holes are drilled, check for fit with one of the push pins. The hole should be snug, not tight. Place the mud flap against the fender/ fender liner and press the push pins through the mud flap, fender and fender liner. Make sure the fender liner is snug against the back of the fender while pushing the pins in. The back of the fender can again be accessed to provide back pressure while pushing the pins in. Hint: Rotate and stage the pry cutouts on the push pins to give easy access for removal before pushing and setting the pins.
There is a little play side to side as the fender liners are not structural. I’ll address this if it becomes an issue. Stay tuned for followup.
EPJK
Thanks for your post EPJK
Just Keep Jeepin everyone,
Carter

